Monitor Screen Not Working? Fix Guide
Understanding How Modern Computer Monitors and Display Screens Function
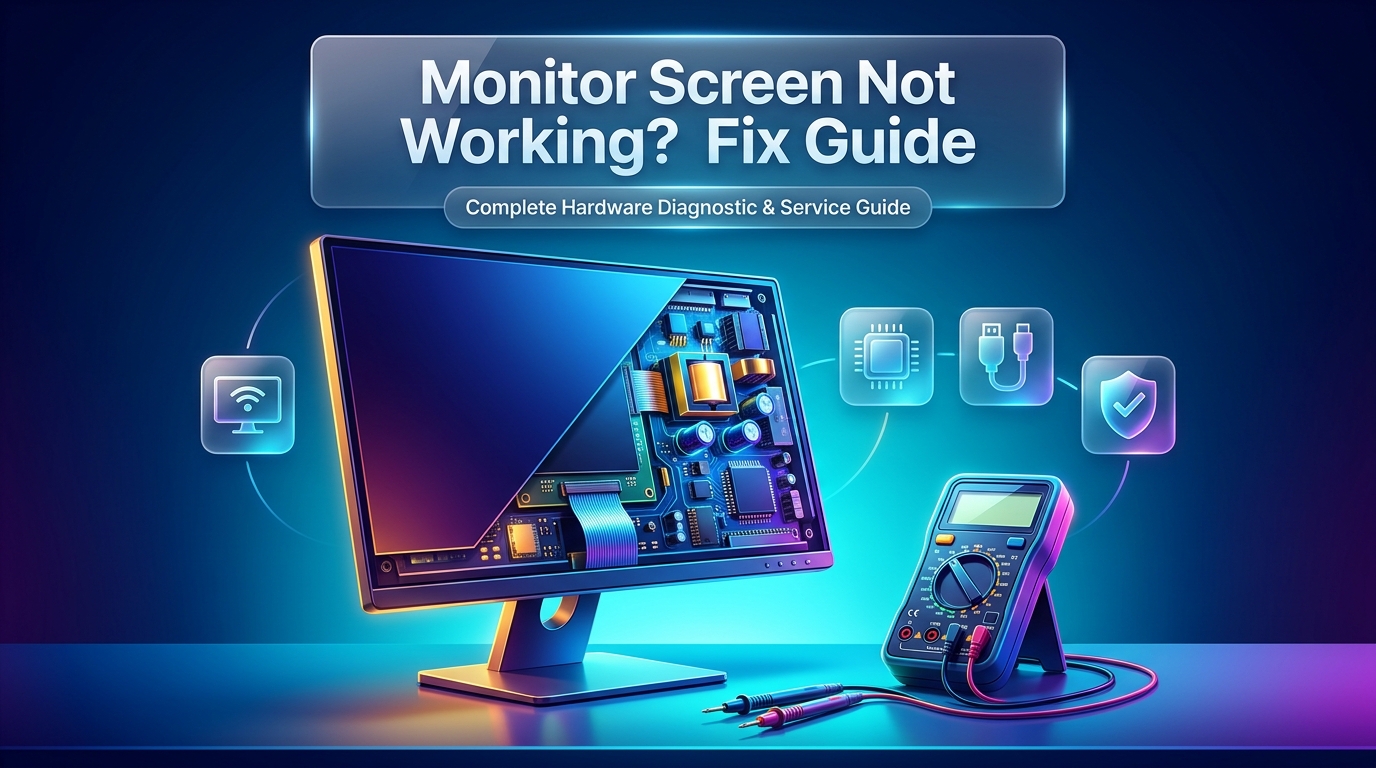
Modern computer displays are sophisticated electro-optical assemblies engineered to translate high-speed digital video data into millions of precisely illuminated picture elements. Whether you rely on a high-refresh-rate gaming monitor, an ultra-sharp 4K graphic design display, or a standard office workstation screen, the internal architecture combines precision power distribution, digital signal processing, and liquid crystal optical modulation. When your display unexpectedly fails to illuminate or shows erratic visual behavior, understanding the physical subsystems operating inside the chassis provides the foundation for effective troubleshooting and targeted hardware repair.
At the center of every display unit sits the LCD panel assembly. Contrary to popular misconception, standard liquid crystal displays do not emit light on their own. Instead, liquid crystal molecules act as microscopic light shutters, twisting and aligning in response to minute electrical charges to permit or block polarized light. Color filters split each individual pixel into red, green, and blue sub-pixels. Illuminating this liquid crystal sandwich requires an active illumination matrix, which in modern displays consists of high-efficiency light-emitting diode (LED) arrays arranged either along the chassis edges (edge-lit) or directly behind the panel surface (direct-lit or full-array local dimming). In contrast, cutting-edge OLED displays utilize self-emissive organic diodes where each individual pixel produces its own illumination and color without requiring a separate backlight layer.
Controlling this complex optical matrix requires three dedicated electronic circuit boards housed behind the panel enclosure. The primary logic controller, commonly known as the scalar board or AD board, serves as the central brain of the monitor. The scalar board receives raw digital video streams transmitted through HDMI, DisplayPort, or USB-C interfaces, decodes the timing signals, scales the incoming resolution to match the native panel matrix, and drives the On-Screen Display (OSD) user interface. Synchronized high-speed video data is then passed via Low-Voltage Differential Signaling (LVDS) or embedded DisplayPort (eDP) ribbon cables to the Timing Controller (T-Con) board. The T-Con board distributes horizontal row and vertical column drive voltages across the panel glass through delicate chip-on-film (COF) ribbon cables.
Powering all of these electronic stages is the Power Supply Unit (PSU). Some monitors rely on an external AC-to-DC power adapter brick that delivers twelve to nineteen volts direct current through a barrel plug or USB-C Power Delivery cable. Many larger desktop and performance monitors integrate a complete Switched-Mode Power Supply (SMPS) board directly inside the rear housing. This internal power board rectifies incoming one-hundred-twenty-volt alternating household current into clean, regulated low-voltage direct current rails, typically supplying twelve volts, five volts, and three-point-three volts to the scalar board, alongside high-voltage current to drive the LED backlight array. When an electrical fault, power surge, or component failure strikes any of these internal subsystems, your monitor screen not working becomes an immediate disruption to your daily productivity or gaming setup.
Categorizing the Core Symptoms: What Is Your Monitor Actually Doing?
Accurate hardware diagnosis requires careful observation of how your equipment behaves when electrical power and video signals are introduced. Computer display failures present across several distinct symptom categories, each pointing toward specific failure modes within the power supply, signal cables, scalar logic, or liquid crystal panel matrix. Categorizing your exact symptom allows you to eliminate unlikely culprits and determine whether a simple cable adjustment or professional computer repair services are necessary.
The first common category is a completely unpowered display, where the unit exhibits zero operational signs. In this scenario, pressing the power button produces no illuminated indicator light, no internal relay click, and no response from the screen. A completely dead display typically indicates an interrupted power pathway. This can stem from a blown wall outlet breaker, a damaged power cord, a failed external AC adapter, or catastrophic failure of primary input rectifiers and capacitors on an internal power supply board.
The second category involves a powered indicator light paired with an entirely pitch-black screen. In these situations, the power LED glows steady blue, green, or amber, yet the display panel remains dark without producing any glow or startup logo. This symptom frequently points toward a backlight illumination failure, a detached T-Con ribbon cable, or an operating system sleep-state lockup. When the logic board powers up successfully but the backlight fails to strike, the image may actually be present on the panel yet invisible to the naked eye because no light passes through the liquid crystal matrix.
The third category is the familiar floating notification box stating "No Signal Detected," "Cable Not Connected," or "Input Signal Out of Range." This message provides valuable diagnostic evidence because it proves that the monitor's internal power supply, scalar logic board, backlight system, and LCD panel are functioning properly. The monitor is actively generating its own graphics and displaying a warning message, which isolates the root failure to the external video cable, the graphics processing unit (GPU), an incorrect display input selection, or damaged port pins on the video interface.
The fourth category is the classic two-second black screen shutdown. When you switch on the monitor, the manufacturer logo or desktop image flashes crisply across the screen for one or two seconds before abruptly vanishing into complete darkness, while the power LED remains illuminated. This specific behavior is a hallmark sign of an inverter protection circuit tripping inside the power supply or backlight driver. When an aged LED backlight strip draws excessive current, or when an internal transformer detects unstable voltage, the power management chip initiates an emergency shutdown of the backlight rails to prevent thermal runaway and fire hazards.
The fifth category encompasses visual distortion, horizontal jitter, flickering horizontal lines, or intermittent blackouts. If your monitor screen flickers randomly during high-refresh-rate gaming or drops signal whenever you adjust the desk height, the issue often stems from bandwidth saturation on an uncertified video cable, loose port solder joints, or thermal throttling within the scalar board's processing chip. Finally, physical trauma resulting in spiderweb glass cracks, internal rainbow-colored vertical bars, or expanding black ink spots confirms structural destruction of the liquid crystal matrix, requiring physical display panel replacement or unit retirement.
| Observable Display Symptom | Component-Level Hardware Cause | External / Environmental Factor | Recommended Action |
|---|---|---|---|
| Completely Dead (No Power LED) | Blown primary input fuse, failed bridge rectifier, or shorted SMPS switching MOSFET. | Tripped surge protector, faulty power cord, or dead external AC-DC power adapter brick. | Test wall outlet with lamp; verify adapter voltage output with multimeter; schedule board repair. |
| Power LED On, Screen Pitch Black | Failed LED backlight driver circuit, burned-out LED strip, or oxidized T-Con ribbon cable. | Operating system deep sleep bug, GPU driver crash, or PC outputting unsupported refresh rate. | Execute the flashlight diagnostic test; restart GPU driver with Win+Ctrl+Shift+B; inspect backlight. |
| "No Signal Detected" Floating Box | Cracked HDMI/DisplayPort solder pads on scalar board or defective interface transceiver IC. | Loose video cable, incorrect input channel selection, defective graphics card, or bent pins. | Verify input source in monitor menu; test with certified replacement cable; test secondary PC. |
| Flashes Image for 2 Seconds, Then Shuts Off | Swollen electrolytic capacitors, degraded inverter transformer, or open-circuit LED backlight rail. | Internal protection circuit tripping due to over-voltage or over-current detection. | Requires professional power supply recapping and backlight circuit component replacement. |
| Screen Flickering, Artifacts, or Signal Drops | Overheating scalar processor, cold solder joints on port pins, or failing voltage regulator rails. | Sub-par HDMI/DisplayPort cable lacking bandwidth for 144Hz/240Hz, or electromagnetic interference. | Upgrade to VESA-certified cable; lower refresh rate in display settings; inspect port solder joints. |
| Spiderweb Cracks, Colored Lines, Ink Bleed | Fractured glass substrate, ruptured liquid crystal layer, or torn chip-on-film (COF) driver tabs. | Direct mechanical impact, pressure damage, accidental drop, or tip-over on desk. | Physical panel glass replacement or unit upgrade required based on panel cost feasibility. |
The Flashlight Test: How to Diagnose a Blown Backlight vs. a Dead LCD Panel
When your display indicator light illuminates but the screen remains dark, one of the most reliable diagnostic procedures you can perform at home or in an office environment is the classic optical flashlight test. This simple non-invasive technique definitively differentiates between a total liquid crystal panel failure and a burned-out backlight illumination circuit, providing vital clarity before you invest in hardware repairs.
To execute the flashlight test properly, ensure that your computer and monitor are both plugged in, turned on, and connected via video cable. Position the system so that your computer is outputting a brightly colored desktop background, open window, or browser tab. Dim the ambient lights in your room to eliminate surface glare. Take a bright LED flashlight or your smartphone's camera torch and hold it at an acute angle approximately one to two inches away from the front surface of the monitor glass. Slowly sweep the beam across various quadrants of the screen while observing the illuminated region closely from several angles.
If you can faintly see the outlines of your desktop icons, mouse pointer, open application windows, or text documents beneath the beam of light, your liquid crystal matrix, timing controller, and scalar logic boards are functioning normally. The liquid crystals are actively twisting and modulating the video image, but because the underlying LED backlight strips or high-voltage inverter circuits are dead, no illumination passes through the glass to project the image to your eyes. In this scenario, your panel is intact, and performing a focused backlight driver repair or LED strip replacement will restore full visual vibrancy.
If the flashlight test reveals nothing across the entire surface—no shadows, no faint text, and no movement when you move your mouse—the problem extends deeper into the hardware. A complete lack of image formation indicates that video data is not reaching the liquid crystal cells. The culprit in this situation is typically a failed Timing Controller (T-Con) board, a detached or oxidized internal flat-flex ribbon cable, a corrupted scalar firmware chip, or an unexpected failure of the low-voltage power supply rails that feed the logic circuitry. In such cases, professional bench diagnostics utilizing digital oscilloscopes are necessary to trace video signal continuity.
Essential Step-by-Step Troubleshooting Checklist for Users
Before assuming your hardware is permanently broken or scheduling bench repair, working through a structured troubleshooting sequence can resolve common software, cable, and power glitches. Many seemingly catastrophic display failures turn out to be minor connectivity or configuration problems that can be rectified in minutes with zero repair costs.
Step one begins with a complete cold power reset, also known as draining residual capacitive charge. Monitors contain large electrolytic capacitors that store high direct-current voltage to stabilize internal power rails. Occasionally, an electrical surge or brief power flicker leaves these capacitors in an unstable latch-up state where the monitor's microcontroller hangs in a frozen protection mode. To clear this state, unplug the monitor's power cord from the wall outlet and detach all video cables from the back of the screen. Press and hold the monitor's physical power button for thirty seconds to discharge all residual capacitance across the circuit boards. Leave the unit unplugged for five full minutes, then reconnect the power cord directly to a verified wall outlet—bypassing power strips and surge protectors—and press the power button.
Step two requires methodical cable verification. Video cables endure significant physical stress from desk adjustments, cable organizers, and monitor arms. A damaged conductor inside an HDMI or DisplayPort cable can pass handshake metadata while failing to deliver high-frequency video clock signals, causing intermittent black screens. Swap your current video cable with a brand-new, certified cable. If you are operating a high-refresh-rate display running at 144Hz, 165Hz, or 240Hz, verify that your cable is rated for HDMI 2.1 or DisplayPort 1.4 bandwidth. High-resolution gaming displays frequently drop signal or remain black when connected through older HDMI 1.4 cables that lack the data throughput required for modern refresh rates.
Step three involves isolating the video source. It is surprisingly common for a failed graphics card, an unstable operating system driver update, or a bent GPU PCIe connector to mimic a dead monitor. Connect your monitor to an alternate video source, such as a secondary laptop, a gaming console, or a streaming device. If the monitor functions immediately on the secondary source, the monitor is in pristine health, and troubleshooting should focus on your primary PC's graphics card, operating system drivers, or system memory. If you suspect computer hardware issues, our dedicated desktop PC and monitor repair specialists can diagnose GPU faults and PCIe slot continuity.
Step four tests the monitor's On-Screen Display (OSD) menu system. With the monitor powered on, press the physical Menu or Settings button located along the bottom bezel or rear directional joystick. If the monitor's internal configuration menu appears crisply on screen, the display's power supply, scalar microcontroller, LED backlight, and LCD glass are functioning properly. This visual confirmation proves that the screen itself is operating, isolating your problem to an incorrect input channel selection (e.g. the monitor is set to DisplayPort while your cable is plugged into HDMI 1), a bad cable, or a computer output failure.
Step five addresses operating system graphics driver hang-ups in Windows. If your computer is running but your screen remains black following a sleep cycle or game launch, press the Windows key plus Control plus Shift plus B simultaneously. This keyboard shortcut forces Windows to immediately restart its graphics subsystem. You will hear a short audio beep and observe the screen flicker briefly as the display driver re-initializes its handshake with the monitor. Furthermore, boot into Windows Safe Mode or clean-install graphics drivers using Display Driver Uninstaller (DDU) to eliminate driver conflicts that prevent proper video handshakes.
Component-Level Internal Hardware Failures: Under the Hood of a Broken Screen
When systematic external troubleshooting fails to restore your display, the failure exists within the discrete electronic components mounted to the internal printed circuit boards. Professional repair centers specialize in diagnosing and replacing these microscopic components, resolving complex hardware failures without requiring you to replace the entire monitor.
Electrolytic capacitor degradation represents the single most common hardware failure in desktop monitors and televisions. Within the Switched-Mode Power Supply board, large cylindrical electrolytic capacitors filter electrical noise and smooth incoming direct current voltage rails. Over thousands of operational hours, the liquid electrolyte contained inside these aluminum cans degrades due to persistent thermal heat and electrical ripple currents. Degraded capacitors exhibit visible outward signs: bulging or domed tops, split safety vents, or dried brown crust along their rubber base seals. When capacitors lose their rated capacitance or develop high Equivalent Series Resistance (ESR), power rails become unstable, causing the monitor to refuse power, buzz audibly, or trip into protective shutdown within seconds of turning on.
Semiconductor failures on the power supply board occur with equal frequency. High-voltage switching MOSFETs (Metal-Oxide-Semiconductor Field-Effect Transistors), bridge rectifiers, and fast-recovery Schottky diodes operate under intense thermal stress. An unexpected voltage spike from a lightning strike or utility grid fluctuation can puncture the gate dielectric of a switching transistor, causing an immediate short circuit to ground that blows the primary ceramic safety fuse. Replacing these failed power semiconductor components with industrial-grade, higher-voltage-rated alternatives restores clean, efficient power delivery.
Mechanical stress on input video connectors is another widespread point of failure. Modern desktop monitors feature input ports soldered directly to the scalar logic board. Heavy, stiff DisplayPort and HDMI cables suspended from the back of an articulating monitor arm exert continuous downward leverage against these solder joints. Over months of tilting, swiveling, and adjusting the screen, the solder pads crack away from the PCB traces, producing loose connections, intermittent signal drops, or total video failure on that specific port. Certified technicians use stereo microscopes and micro-soldering rework stations to re-anchor the connector housing and bridge severed copper signal traces.
Timing Controller (T-Con) and Chip-on-Film (COF) driver issues cause severe horizontal or vertical visual artifacts. The T-Con board decodes high-speed video data and sends scanning voltage pulses to the driver ICs bonded directly to microscopic flexible ribbon films attached to the panel glass. If moisture, excessive humidity, or localized overheating damages these COF ribbons, the screen develops persistent colored vertical lines, half-screen blackouts, or a completely white display. While damaged COF ribbons require specialized thermocompression bonding equipment, standalone T-Con boards can be easily diagnosed, repaired, or replaced at minimal cost.
| Panel Technology | Core Visual Strengths | Most Common Hardware Failure Points | Repair Feasibility & Strategy |
|---|---|---|---|
| IPS (In-Plane Switching) | Superior color accuracy, wide 178-degree viewing angles, excellent consistency. | Edge-lit LED backlight failure, T-Con ribbon oxidation, backlight bleed around corners. | Highly Repairable (Backlight strips and logic boards are readily serviceable). |
| VA (Vertical Alignment) | Deep black levels, high native contrast ratios (3000:1), popular in curved gaming screens. | Internal curvature delamination, power supply capacitor failure, thermal cold solder joints. | Moderate to High (Power board and scalar circuits are easily repaired). |
| TN (Twisted Nematic) | Ultra-fast pixel response times, budget affordability, legacy competitive gaming. | Inverter transformer failure, capacitor dry-out, CCFL or early LED backlight burnout. | Moderate (Board repair is feasible; panel replacement rarely economical). |
| OLED / QD-OLED | Infinite contrast ratio, true 0-nit blacks, instantaneous pixel response, HDR mastery. | Sub-pixel static burn-in, mainboard voltage regulator degradation, thermal sensor errors. | Complex (Requires specialized mainboard repair; panel burn-in is irreversible). |
Cracked Panels vs. Internal Board Failure: The Repair vs. Replace Decision Matrix
One of the most critical decisions consumers and business owners face when encountering display failure is determining whether professional repair is financially viable compared to purchasing a brand-new monitor. The answer hinges almost entirely on the specific nature of the hardware damage.
When a monitor suffers physical panel breakage—such as a spiderweb crack across the outer glass, an internal crack from an accidental drop, or an ink-like blob spreading across the display—the liquid crystal cell itself is destroyed. Unlike mobile devices and laptops where replacement display assemblies are mass-produced and cost-effective, standalone desktop monitor manufacturers do not sell individual replacement LCD panels to the open market at competitive pricing. Sourcing an original raw replacement panel often costs seventy to eighty-five percent of the monitor's original retail price, without including shipping and labor costs. For budget-tier monitors costing under one hundred fifty dollars, physical glass fractures generally mean that replacing the entire unit is the most economical path forward.
However, when the physical glass is intact and the failure stems from internal electronic circuitry, professional repair is overwhelmingly the smarter, more economical, and environmentally sustainable choice. The vast majority of display failures do not involve broken glass; they involve blown capacitors on power supply boards, burned-out LED driver circuits, damaged HDMI or DisplayPort input jacks, or failing voltage regulators. Component-level board repairs typically cost a fraction of the price of a replacement monitor. This repair value proposition is especially compelling for premium displays, including twenty-seven-inch and thirty-two-inch 4K editing monitors, curved ultrawide displays, professional color-calibrated monitors (such as Dell UltraSharp, BenQ, and ASUS ProArt), and high-refresh-rate gaming monitors (such as Samsung Odyssey and LG UltraGear) that cost anywhere from four hundred to over fifteen hundred dollars. In these high-value scenarios, expert computer repair services restore full operational performance while saving you hundreds of dollars.
| Repair Assessment Parameter | Do-It-Yourself (DIY) Repair Attempt | Professional Repair Facility Service |
|---|---|---|
| Electrical Shock Hazard | Severe Hazard (Internal SMPS capacitors hold 160V to 400V DC even when unplugged). | Zero Hazard (Technicians utilize high-voltage discharge probes and ESD workstations). |
| Required Diagnostic Instrumentation | Basic visual inspection and entry-level household multimeters lacking ESR testing. | In-circuit ESR meters, digital storage oscilloscopes, and thermal imaging cameras. |
| Chassis & Bezel Damage Risk | High (Prying plastic bezels with improper tools snaps retaining tabs and cracks panel edges). | Safe (Non-marring specialized acoustic separation shims preserve factory aesthetic). |
| Component Sourcing & Longevity | Generic consumer replacement parts often degrade quickly under sustained heat. | High-temperature 105°C Japanese electrolytic capacitors and OEM-spec ICs. |
| Warranty & Labor Protection | No warranty coverage; risks accidental damage to motherboard or display glass. | Comprehensive parts and labor warranty protecting your repair investment. |
Step-by-Step Breakdown: How Professional Monitor Screen Repair is Conducted in a Repair Lab
Repairing an advanced computer monitor requires rigorous adherence to electrical safety procedures, micro-soldering precision, and systematic signal tracing. Understanding the professional workflow executed by certified hardware technicians illustrates why workshop repairs deliver durable, factory-grade reliability.
The repair workflow begins with comprehensive intake electrical safety testing. Because internal switched-mode power boards contain massive primary filter capacitors capable of storing lethal electrical charges exceeding three hundred volts for hours after disconnection, technicians immediately discharge these storage reservoirs using specialized high-wattage resistive discharge probes. Once safe potential is established, the monitor is connected to a dedicated bench variable power supply and digital power analyzer to measure static standby draw and observe current consumption profiles under initialization.
Disassembly requires meticulous mechanical care. Modern slim-bezel monitors lack visible perimeter screws; instead, the front bezel and rear clamshell are joined by hidden snap-fit mechanical tabs. Technicians utilize non-marring nylon pry wedges and pneumatic suction levers to release perimeter latches without scratching the matte casing or pinching the delicate edge of the internal LCD panel. The internal aluminum electromagnetic interference (EMI) shield is detached to expose the main logic board, power distribution board, and LED backlight driver.
Technicians then conduct in-circuit diagnostic testing using specialized instrumentation. An in-circuit Equivalent Series Resistance (ESR) meter measures capacitor health without desoldering them from the circuit board, instantly pinpointing dried-out or high-resistance capacitors that standard multimeters miss. Thermal imaging cameras scan the board under power to detect localized thermal hotspots caused by shorted ceramic surface-mount capacitors, failing linear regulators, or struggling scalar processors.
Once defective components are identified, technicians execute precision micro-soldering. Using temperature-controlled induction soldering stations and hot-air rework systems, failed components are cleanly desoldered. Solder pads are cleaned with copper braid and high-purity flux, and new industrial-grade components—such as one-hundred-five-degree-Celsius-rated low-ESR electrolytic capacitors, high-amperage Schottky diodes, or reinforced HDMI interface sockets—are soldered into place with lead-free eutectic solder. Solder joints are examined under high-magnification stereoscopic microscopes to guarantee complete wetting, zero bridging, and mechanical integrity.
Following hardware restoration, the monitor undergoes multi-stage functional and burn-in testing. Technicians connect high-definition video pattern generators to test every input port across multiple resolutions and refresh rates, verifying color gradient transitions, response times, and HDCP compliance. The monitor is placed on a thermal burn-in bench under continuous operational load for several hours to confirm thermal stability, steady voltage regulation, and zero intermittent flicker before the unit is certified and returned to the customer.
Preventative Best Practices: How to Protect Your Monitor and Prevent Future Failures
Implementing basic preventative maintenance habits significantly extends the operational lifespan of your computer monitor and protects its sensitive internal circuitry from premature degradation. Following these straightforward guidelines preserves display vibrancy and prevents costly hardware breakdowns.
The most important preventative measure is protecting your equipment against power surges and voltage fluctuations. Utility grid voltage spikes, lightning strikes, and harmonic electrical noise from air conditioners or vacuum cleaners degrade internal power supply capacitors and sensitive scalar chips. Connect your monitor and computer to a high-quality surge protector rated for at least two thousand joules, or ideally, a pure sine-wave Uninterruptible Power Supply (UPS). A UPS regulates incoming voltage dips and brownouts, preventing violent power cycling that damages internal power circuits.
Ensuring proper ventilation prevents internal thermal accumulation. Switched-mode power supplies and LED backlight drivers generate significant heat during daily operation. Avoid pushing the rear of your monitor flush against a wall or enclosing it inside unventilated desk cubbies. Periodically inspect the top and rear ventilation slots, using a can of compressed air to clear accumulated household dust that restricts convective cooling and causes capacitors to dry out prematurely.
Managing cable tension protects fragile input ports. Heavy DisplayPort and braided HDMI cables suspended from monitor arms should always be secured with cable ties or velcro straps that provide adequate slack. Leaving a gentle loop near the monitor's input jack relieves mechanical leverage against the internal solder joints, preventing cracked connector pads when you adjust the screen's height or angle. If you experience loose cable connections or port dropouts on other devices, professional computer repair services or gaming console repair can reinforce damaged video jacks.
Finally, optimize your display brightness and sleep timer configurations. Operating your monitor continuously at one hundred percent brightness drives the LED backlight strips at maximum current and temperature, substantially accelerating phosphor decay and premature LED burnout. Setting your brightness between sixty and seventy-five percent provides comfortable illumination while dramatically prolonging backlight lifespan. Furthermore, configure your operating system to put the display to sleep after ten to fifteen minutes of inactivity, preserving both energy and internal component longevity.
Why Choose Phone Repair Place for Monitor and Display Hardware Repair
When your computer display fails, finding a reputable technical facility equipped for component-level board repair ensures fast, affordable, and durable results. At Phone Repair Place in Hyattsville, MD, we combine certified micro-soldering expertise, professional diagnostic equipment, and transparent pricing to deliver exceptional display restoration services.
Our certified technicians specialize in component-level circuit board diagnostics. Rather than declaring an expensive monitor scrap simply because a power supply capacitor failed or an HDMI port became loose, we diagnose and replace the defective components directly on the board. This component-level methodology saves our customers hundreds of dollars compared to buying new displays or paying exorbitant manufacturer replacement fees.
We service all major monitor and computer brands, including Dell, HP, Lenovo, ASUS, Acer, Apple, Samsung, LG, MSI, ViewSonic, and BenQ. Whether you own a multi-screen trading workstation, an ultra-wide curved gaming monitor, or a professional color-critical photography display, our technicians handle your hardware with surgical precision. Our workshop is centrally located inside The Mall at Prince Georges in Hyattsville, MD, offering convenient walk-in service and rapid diagnostic turnaround times.
Every monitor hardware repair performed at Phone Repair Place is backed by our comprehensive parts and labor warranty, giving you total peace of mind that your investment is fully protected. In addition to desktop display servicing, we offer full-spectrum device repair, including desktop PC and monitor repair, smartphone repair services, Samsung device repairs, and laptop screen replacements.
Visit Phone Repair Place for Fast, Professional Monitor Screen Repair
Do not let a broken monitor, blank screen, or flickering display disrupt your workday, creative projects, or gaming sessions. Bring your device to Phone Repair Place for certified diagnostics and expert component-level hardware repair. Walk-ins are warmly welcomed daily at our Hyattsville repair center, or call us today to speak directly with an experienced hardware technician.
Phone Repair Place
3500 East-West Hwy STE 1417,
Hyattsville, MD 20782, United States
(202) 870-4914
https://phonerepairpgmall.com/
Frequently Asked Questions About Monitor Screen Repair
How do I know if my monitor power board or LCD panel is broken?
A failed power board typically causes the monitor to show no power indicator light or turn on for only two seconds before shutting down, while a broken panel shows spiderweb cracks, black ink blotches, or colored vertical lines across the glass. If the power light stays on but the screen is dark, the flashlight test can help verify whether the underlying LCD panel is still receiving video images.
Can a monitor with a broken or cracked screen glass be repaired?
Repairing a physically cracked desktop monitor glass requires replacing the entire internal LCD or OLED panel matrix, which frequently costs almost as much as purchasing a new budget monitor due to manufacturing parts pricing. However, for high-end gaming monitors, ultrawide curved screens, and professional color-accurate displays, panel sourcing and replacement can still be economically viable.
Why does my monitor display No Signal Detected when the computer is running?
The "No Signal Detected" message indicates that the monitor's internal power supply and logic boards are working properly, but no video stream is reaching its input ports. This issue is typically caused by a loose or damaged video cable, an incorrect input channel selection, a failing graphics card port, or an outdated computer display driver.
How long does a professional monitor screen diagnostic and repair take?
Most initial hardware diagnostics and power supply evaluations are completed within 30 to 45 minutes at our Hyattsville repair center. Standard component-level repairs, such as capacitor recapping or HDMI port re-soldering, are typically completed same-day or within 24 to 48 hours depending on parts availability.
Is it worth repairing an older desktop monitor?
If your monitor failure is caused by degraded capacitors, a blown power supply fuse, or a cracked video jack, component-level repair is highly cost-effective and saves you from replacing a perfectly functional display. We always provide an honest diagnostic evaluation so you can make an informed decision based on the value of your specific display model.
Need This Problem Fixed Fast?
Bring your broken smartphone, tablet, or console to Phone Repair Place in Hyattsville, MD for quick diagnosis and same-day turnaround.