Android Phone Not Charging: 10 Common Causes and Fixes
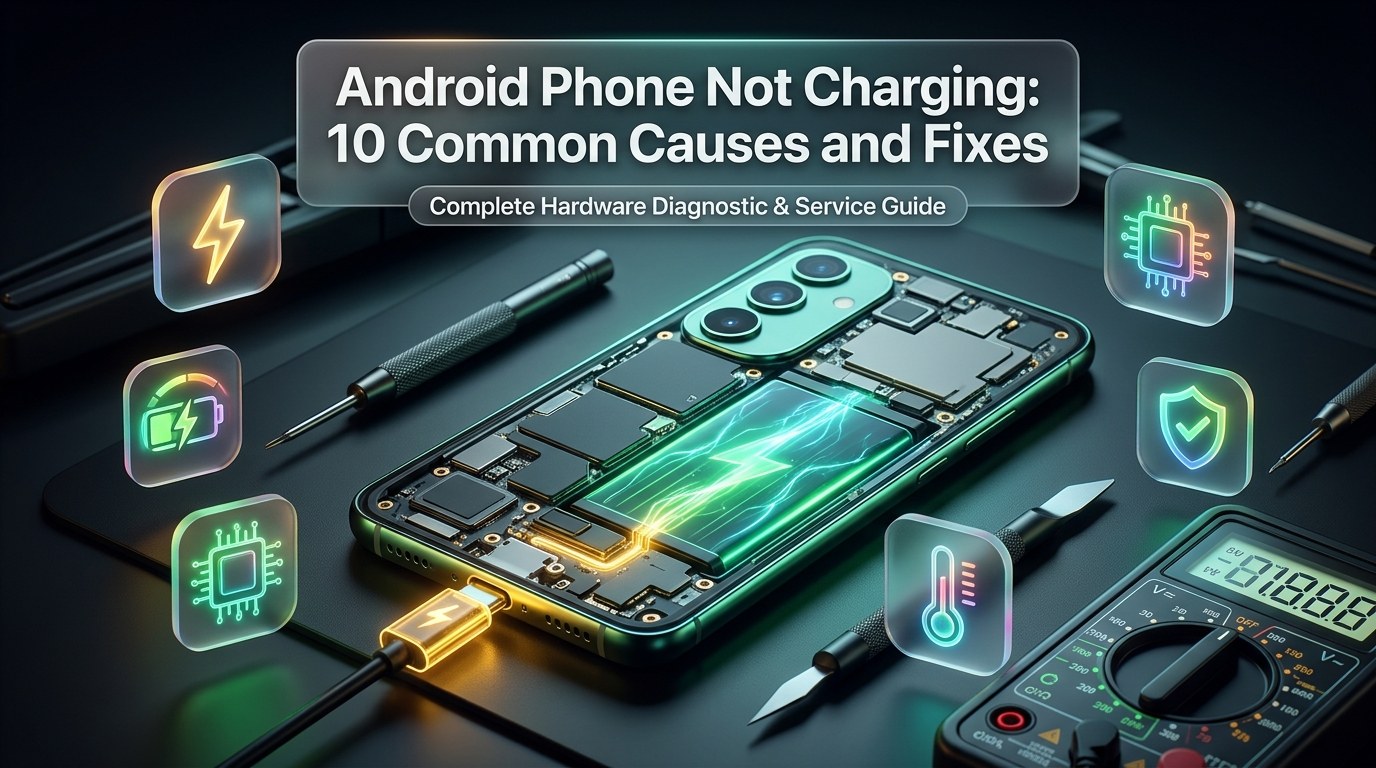
The Anatomy of Modern Android Charging Systems and Why Failures Occur
Few hardware malfunctions create more immediate disruption in daily life than plugging in your smartphone and realizing that your device is completely unresponsive. Modern mobile technology powers communication, navigation, banking, and professional workflows, making consistent battery recharging essential. When you encounter a phone not charging, identifying whether the underlying root cause stems from a trivial lint blockage, a degraded charging cable, a firmware lockup, or a catastrophic failure on the main logic board requires a methodical technical understanding of how contemporary mobile power circuits operate.
Modern Android smartphones rely heavily on universal USB Type-C architecture governed by sophisticated electrical protocols including USB Power Delivery (USB-PD 3.0), Programmable Power Supply (PPS), Qualcomm Quick Charge, and proprietary manufacturer standards like Samsung Super Fast Charging. Unlike early cellular phones that accepted fixed 5-volt direct current through simplistic two-wire copper leads, contemporary high-speed charging involves dynamic two-way digital communication. When you insert a USB-C connector into your handset, dedicated Configuration Channel (CC) pins actively exchange digital handshake packets between the power adapter and the phone's internal charging controller. This negotiation establishes the exact voltage and amperage tiers—ranging from 5V at 3A up to 20V at 5A—that the device can safely receive based on battery state of charge, internal temperatures, and circuit resistance.
Because these high-wattage charging architectures require millivolt-level precision, any disruption along the electrical path can instantly halt the charging process. A microscopic film of pocket lint compacted into the connector cavity, a frayed data line inside an inexpensive cable, or an overheated lithium-ion battery cell will cause the power management daemon to trigger emergency safety cutoffs. Understanding the distinct failure modes across accessories, physical receptacles, sub-circuit daughterboards, and primary power management integrated circuits (PMICs) enables you to isolate the problem efficiently and execute the correct restorative measures without causing secondary hardware damage.
Quick Diagnostic Triage: Isolating the Problem in Five Minutes
Before disassembling hardware or scheduling a repair consultation, executing a rapid five-minute triage workflow eliminates external variables and pinpoints where the electrical failure resides. When faced with an Android phone not charging properly, many device owners assume their handset has suffered an internal hardware collapse when the actual culprit is an inexpensive third-party accessory or an easily resolved software glitch.
Begin your triage by conducting an accessory isolation cross-test. Disconnect your Android device and connect a secondary phone, tablet, or accessory to the exact same wall adapter and charging cable. If the secondary device charges smoothly at full speed, you have successfully verified that both the power brick and cable are functioning. Conversely, if the secondary device also fails to draw power, the wall adapter or cable is defective, completely exonerating your phone. To double-check, plug your Android phone into an entirely different, known-good charging setup using an original equipment manufacturer (OEM) power brick and a certified USB-C cable plugged directly into a verified wall outlet rather than a power strip or laptop USB hub.
Next, evaluate the tactile connection feel of the USB-C port. When you insert a clean cable into an undamaged USB-C receptacle, you should feel and hear a positive, tactile mechanical click. The plastic connector housing of the cable should sit flush against the phone's outer aluminum frame with virtually zero lateral wiggle or back-and-forth wobble. If the cable feels spongy, fails to seat completely, or rocks loosely from side to side with the slightest touch, physical obstruction or internal contact wear is almost certainly interrupting electrical continuity.
Observe the battery icon and charging indicator display on your screen. Android provides visual diagnostic feedback when connected to power. Note whether your handset displays a solid lightning bolt inside the battery icon, a slow-blinking empty battery silhouette, a flashing yellow warning triangle, a water droplet graphic, or no visual response whatsoever. For handsets equipped with Qi wireless charging capabilities—such as the flagship devices covered in our Samsung phone repair specialists division—placing the device on a wireless charging pad provides immediate insight. If the phone charges reliably via induction but refuses to accept power through the cable, the battery and main operating system are operational, isolating the fault squarely to the wired USB-C port subsystem.
1. Compacted Pocket Lint, Dirt, and Debris in the USB-C Port
Compacted pocket lint is statistically the single most frequent cause of mobile charging failures encountered by repair technicians. Because smartphones spend hours each day inside denim jeans, jackets, purses, and work aprons, the open cavity of the USB-C receptacle acts as a continuous collector for airborne fibers, textile lint, sawdust, makeup residue, and microscopic debris. Over weeks and months, every time you plug in a charging cable, the metal tip acts like a piston, compressing loose fibers into a dense, felt-like mat at the very bottom of the port cavity.
As this compressed lint layer accumulates, it creates a physical barrier that prevents the male USB-C plug from penetrating to its designated mechanical depth. In a USB Type-C interface, the outer shell provides physical alignment while the spring-loaded contacts inside the plug must establish firm mechanical and electrical pressure against the central pin tongue. When lint prevents full insertion, the critical VBUS power pins and Configuration Channel lines make partial or zero contact, resulting in a phone not charging situation or an unstable connection that disconnects whenever the handset is moved.
Clearing a clogged USB-C port requires patience and non-conductive tools. Never insert metallic implements like sewing needles, paperclips, safety pins, or SIM ejector tools into the port. The center of a female USB-C port houses a wafer-thin circuit tongue populated with 24 microscopic gold-plated contact pins. Probing with metal can bend these delicate pins, scrape off the protective gold plating, or bridge the 5V-20V VBUS line directly to an adjacent data or ground line, causing an instantaneous short circuit that destroys the charging controller chip.
To clean the port safely at home, use an intensely bright flashlight or desk lamp to inspect the interior recess. Take a sturdy wooden toothpick or a dedicated non-conductive anti-static plastic dental micro-probe. Carefully whittle the tip of the wooden toothpick with a craft knife if necessary to make it slender enough to slide easily into the narrow gaps on either side of the central pin tongue. With the phone powered off, gently sweep along the floor of the port cavity, hooking beneath the compacted lint clumps and lifting them outward. Avoid applying upward or downward prying force against the central pin tongue. Once loose fibers are dislodged, use short, controlled bursts from a can of compressed gas held upright at a 45-degree angle to blow out residual dust. Re-inspect with a light and test the cable connection.
2. Damaged, Frayed, or Inferior Charging Cables
Charging cables endure relentless mechanical abuse throughout their working lifespan. They are twisted, coiled, yanked from wall sockets, stepped on, and bent sharply at acute angles while users browse their devices in bed or inside vehicle cup holders. Beneath the flexible outer silicone or nylon braided jacket of every USB-C cable lies an intricate bundle of ultra-thin, enamel-insulated copper conductors, braided shielding foil, and Kevlar reinforcement strands.
A damaged charging cable is among the most frequent explanations for an Android phone not charging when connected to wall power. Repeated bending concentrates physical strain directly at the strain-relief collar where the flexible cord meets the rigid plastic connector head. Over time, individual copper strands inside the VBUS power wires suffer metal fatigue and snap beneath the intact outer jacket. This internal break may initially manifest as intermittent charging where the phone only accepts current when the cord is bent or angled in a specific direction. Eventually, as the remaining strands break completely, electrical continuity drops to zero.
Modern high-wattage charging introduces another layer of complexity: integrated E-Marker (Electronic Marking) microchips. Cables certified for high-power delivery (such as 60W, 100W, or 240W charging standards) house miniature silicon chips inside the connector overmold that identify the cable's current-carrying capacity to the connected phone and charger. If an inexpensive, counterfeit, or physically degraded cable suffers a blown E-Marker chip, the Android operating system will immediately drop charging rates to a sluggish 500mA baseline or reject the cable entirely to prevent electrical overheating.
Always inspect your cable along its entire length for bulging, kinks, discolored plastic, exposed copper shielding, or charred pin traces inside the metal tip. When replacing charging cables, invest in robust, USB-IF certified cables from reputable manufacturers featuring heavy gauge internal power wiring (20AWG to 22AWG) and reinforced strain relief boots. Using substandard budget cables purchased at convenience stores frequently causes voltage drops, excessive heat buildup, and premature failure.
3. Faulty, Underpowered, or Incompatible Wall Adapters
The wall charging adapter, commonly called the power brick, transforms 110V–240V alternating current (AC) from your home electrical outlet into clean, regulated direct current (DC) tailored to your smartphone. Inside every modern charger sits a complex switched-mode power supply featuring rectifiers, high-voltage capacitors, high-frequency transformers, and intelligent control ICs. When these internal components degrade or overheat, the adapter loses its ability to deliver stable electrical output.
A power adapter can experience partial component failure where it illuminates an indicator LED or supplies an initial 5V trickle but instantly collapses under heavy current demand. When your Android handset initiates its fast-charging handshake and requests 2A or 3A of current, a compromised adapter with failing output capacitors will suffer a sudden voltage drop. The phone's onboard power management circuit detects this voltage sag below the minimum acceptable threshold and automatically terminates the charging session to protect internal hardware, producing an endless cycle of connecting and disconnecting chimes.
Protocol incompatibility is another widespread issue. Older power bricks manufactured for legacy micro-USB devices rely on basic 5V/1A or 5V/2A power curves. When plugged into modern Android smartphones packing massive 4,500mAh to 5,500mAh batteries, these legacy bricks supply insufficient energy. If the screen is turned on, or if intensive background processes like cloud backups or navigation are active, the device may consume energy faster than the aging adapter can supply it, leading users to believe their phone is refusing to charge.
To ensure optimal power delivery, use power adapters that support open modern standards such as USB Power Delivery 3.0 and PPS (Programmable Power Supply). Compact Gallium Nitride (GaN) chargers offer superior energy efficiency, run dramatically cooler than traditional silicon-based bricks, and feature multi-stage short-circuit and over-voltage protection circuits that preserve your handset's delicate internal electronics.
4. Bent, Corroded, or Broken USB-C Port Contact Pins
While USB Type-C is fundamentally more durable and mechanically versatile than its predecessor micro-USB, it is not indestructible. The internal architecture of a female USB-C port features a centered substrate tongue containing 12 gold-plated contact pins on the upper face and 12 pins on the lower face. These pins handle power transfer (VBUS), electrical ground (GND), high-speed data transmission (TX/RX), legacy USB 2.0 communication (D+/D-), and configuration negotiation (CC1/CC2).
Physical trauma is a primary vector for pin destruction. Inserting a charging cable with excessive force, rocking the plug aggressively from top to bottom, or tripping over an outstretched charging cord while the handset sits on a nightstand exerts severe torsional leverage on the port's internal structure. This mechanical stress can bend individual contact pins backward, flatten their sprung curvature so they no longer touch the mating plug, or crack the central plastic tongue entirely. Once the central tongue fractures, inserting a cable will push loose contacts into direct cross-contact, causing short circuits that disable the entire device.
Corrosion presents an equally destructive chemical hazard. Moisture from sweaty gym pockets, rainy outdoor environments, or coastal humidity introduces moisture droplets into the port cavity. When electrical current flows across pins in the presence of moisture and dissolved airborne minerals, rapid galvanic and electrolytic corrosion takes place. The microscopic gold plating erodes, exposing the underlying copper and nickel alloy to rapid oxidation. This produces a crusty green, black, or chalky white residue across the pin surfaces. Oxidized metal acts as an electrical insulator, introducing high contact resistance that blocks current flow, generates intense localized heat, and scorches the contact pads.
Inspecting the port under high-magnification illumination reveals whether pins are bent, missing, or corroded. While mild surface oxidation can sometimes be remediated by a technician using precision micro-brushes soaked in 99% anhydrous isopropyl alcohol, physically deformed pins or cracked tongue substrates cannot be bent back reliably. Attempting to bend microscopic pins back into shape fatigues the brittle alloy, causing them to snap off completely. When pin structure is compromised, professional replacement of the charging receptacle or sub-board is mandatory.
5. Software Glitches, Frozen Charging Daemons, and Rogue Background Apps
Power management in contemporary Android smartphones is heavily governed by the operating system kernel and dedicated low-level firmware. When you plug in a charger, the hardware generates an electrical interrupt that awakens the kernel's power supply driver. This driver coordinates with the Android system battery service, monitoring voltage, battery percentage, charging velocity, and thermal metrics through continuous software polling loops.
Like any complex operating software, these power management daemons can encounter unhandled exceptions, memory leaks, or race conditions that cause them to freeze. Firmware lockups can trick the system into behaving as if your phone not charging is a permanent hardware defect, when in reality the operating system remains unaware that a power source has been physically introduced. The screen remains black, the battery icon fails to update, and no charging current is routed into the cell, creating the convincing illusion of a dead hardware port.
Third-party applications can also sabotage the charging subsystem. Poorly optimized apps, aggressive crypto-mining malware, buggy background location tracking, or conflicting battery optimization utilities can hold persistent wakelocks. These wakelocks force the central processing unit (CPU) and graphics processor (GPU) to run continuously at maximum clock frequencies. If an application draws 15 watts of power while a basic charger is only supplying 10 watts, the battery will continue to deplete rapidly despite being physically plugged into the wall.
Executing targeted software recovery steps often resolves these firmware lockups without requiring technician intervention:
- Forced System Hard Reset: Perform a simulated battery pull by simultaneously pressing and holding the Power button and Volume Down button for 10 to 15 seconds until the device vibrates and the manufacturer boot logo appears. This forces the hardware controller to reset power rails and restarts all system daemons from scratch.
- Booting into Android Safe Mode: Power on the device while holding the Volume Down key (or long-press the on-screen "Power Off" prompt on most Android skins) to enter Safe Mode. Safe Mode temporarily disables all third-party downloaded applications. If your device charges smoothly in Safe Mode, you have confirmed that a downloaded application is interfering with the power subsystem. Uninstall recently downloaded utilities, battery monitors, and cleaning apps one by one.
- Wiping the System Cache Partition: Power off your device completely. Hold the Power and Volume Up buttons to enter the Android Recovery Menu. Using the volume rockers to navigate, select "Wipe Cache Partition" and confirm with the power button. This flushes temporary system files and corrupted update residue without deleting personal photos, messages, or apps.
- Installing Pending Firmware Updates: Manufacturers regularly distribute security patches and kernel updates that resolve known battery calibration bugs, charging throttling errors, and USB audio/power negotiation conflicts. Navigate to Settings > System > Software Update to ensure your device is running the latest stable firmware build.
6. Moisture Detection Sensor Lockout and Liquid Residue
Modern Android handsets frequently boast IP67 or IP68 water and dust resistance ratings, allowing them to withstand accidental splashes, brief submersion, and humid weather. However, water resistance does not mean water immunity, and liquid entry into the charging port triggers active electronic defense mechanisms designed to prevent catastrophic short circuits.
Inside the USB-C port, sensitive sensor circuitry continuously measures electrical impedance and resistance between specific reference pins. Pure water, and particularly tap water, sweat, chlorinated pool water, and beverages, contains dissolved minerals, electrolytes, and salts that conduct electricity. If moisture bridges the connection between the 5V power line and ground, applying charging current would generate high-amperage arcing, instantly scorching the port and vaporizing delicate motherboard traces. When the sensor detects moisture or high conductivity, the operating system immediately triggers a persistent lockout notification—frequently accompanied by an audible alarm and a yellow water droplet warning on Samsung Galaxy and Google Pixel handsets—and physically disconnects the charging circuit.
Encountering a moisture lockout requires disciplined patience. Many users panic and make catastrophic mistakes such as using a hot hair dryer, blowing compressed air directly into the port, or inserting cotton swabs. Applying high heat from a hair dryer melts delicate internal waterproof adhesive gaskets, warps the plastic tongue, and can cause the lithium battery cell to swell dangerously. Blowing high-pressure air forces moisture droplets deeper into the phone's internal chassis past the water-resistant mesh barriers. Swabbing with cotton leaves loose fibrous strands tangled around contact pins.
The correct response is gentle, passive dehydration. Hold the phone vertically with the charging port facing downward and tap it gently against the palm of your hand to dislodge excess pooled liquid. Place the handset in a well-ventilated, dry room in front of a gentle electric fan blowing cool air directly across the port opening. Allow the phone to dry undisturbed for at least 3 to 6 hours. If the moisture warning persists for days after thorough drying, conductive mineral deposits or residue from sugary beverages or salt water may have coated the pins. In such cases, professional ultrasonic cleaning or port module replacement at our professional Android phone repair services workshop is necessary to remove the microscopic conductive film.
7. Severe Lithium-Ion Battery Degradation and Deep Discharge Sleep
Every rechargeable smartphone battery operates on lithium-ion or lithium-polymer electrochemistry. Inside the cell, lithium ions migrate back and forth between positive cathode and negative anode plates through an organic liquid electrolyte solution. While lithium technology provides extraordinary energy density in an ultra-slim form factor, the chemistry undergoes irreversible degradation with every charging and discharging cycle.
Under normal usage conditions, a quality smartphone battery maintains optimal health for approximately 500 to 800 full charge cycles—roughly 18 to 24 months of daily charging. As the battery ages, the solid electrolyte interphase (SEI) layer thickens, microscopic metallic lithium plating accumulates on the anode, and the cell's internal electrical resistance climbs significantly. As internal resistance escalates, the battery can no longer absorb electrical current efficiently. When cell degradation leads to an Android phone not charging even after hours connected to a wall socket, the battery controller detects this thermal and electrical strain and throttles charging intake down to a bare crawl.
An even more dramatic failure mode occurs when a phone is left unused for weeks in a completely depleted state, entering a condition known as "Deep Sleep" or over-discharge. A standard 3.85V lithium cell operates safely between 3.0V (fully discharged) and 4.4V (fully charged). If a depleted battery sits uncharged, parasitic board drain will eventually pull cell voltage below the critical 2.5V safety floor. When voltage drops below this threshold, copper from the anode current collector begins dissolving into the electrolyte. If recharged normally, this dissolved copper forms microscopic conductive needles called dendrites that can pierce the separator membrane, causing catastrophic internal short circuits and fires.
To eliminate this fire risk, the battery's integrated protection circuit module (PCM) permanently opens its internal solid-state switches, severing the connection between the battery terminals and the phone's power rails. When you plug in a device suffering from deep discharge sleep, standard chargers cannot detect a closed circuit and will refuse to supply power, leaving your phone completely lifeless. In our repair facility, technicians can sometimes safely wake deep-sleep cells using bench power supplies with micro-current trickle-charge protocols. However, if the cell has suffered internal chemical breakdown, physical swelling, or high cycle degradation, a full OEM-specification Samsung Galaxy S series repairs or Android battery replacement is the only safe and lasting remedy.
8. Thermal Throttling and Extreme Operating Temperatures
Lithium-ion batteries are extraordinarily sensitive to ambient and internal operating temperatures. Safe, rapid charging can only take place within a strictly defined thermal window, typically between 15°C and 35°C (59°F to 95°F). Modern Android smartphones incorporate multiple high-precision Negative Temperature Coefficient (NTC) thermistors strategically positioned across the battery pack, charging sub-board, processor, and USB port assembly to continuously monitor thermal health.
When environmental conditions or heavy processing loads cause internal battery temperatures to exceed 45°C (113°F), the kernel initiates aggressive thermal throttling. The phone will immediately drop from high-speed charging tiers (such as 45W or 25W) down to standard 5W charging. If temperatures continue to rise toward 50°C (122°F), the charging controller halts power intake entirely to protect the chemical integrity of the battery and prevent thermal runaway. Common triggers include charging your device on an automobile dashboard in direct sunlight, charging inside thick, unventilated heavy-duty phone cases, or running demanding 3D gaming titles, video rendering, or high-definition camera recording while plugged into a high-wattage fast charger.
Conversely, charging in freezing environments below 0°C (32°F) poses an equally grave chemical hazard. At sub-freezing temperatures, the diffusion rate of lithium ions inside the anode slows drastically. Attempting to force high charging current into a cold cell causes metallic lithium plating to form directly on the anode surface rather than intercalating into the graphite structure. This permanently degrades battery capacity and creates permanent internal short-circuit hazards. Consequently, Android power management firmware will flatly refuse to charge a battery detected below freezing temperatures, frequently presenting a thermometer icon with an exclamation mark.
To resolve temperature-induced charging cutoffs, disconnect the handset immediately and relocate it to a climate-controlled room. Remove bulky protective cases that trap heat against the glass rear panel. Allow the device to rest passively for 20 to 30 minutes until its internal temperature normalizes to ambient room temperature before reconnecting the charger. Never place an overheating phone in a refrigerator or freezer; sudden temperature drops cause rapid internal moisture condensation that corrodes motherboard electronics.
9. Loose Sub-Board Daughterboard, Interconnect Flex Cables, or Micro-Cracks
The interior architecture of modern Android smartphones utilizes a modular dual-board layout. The primary logic board (housing the main processor, memory, storage, and wireless modems) resides in the upper third of the chassis, while a secondary daughterboard—commonly known as the charging sub-board—is positioned at the bottom of the device. This sub-board houses the USB Type-C receptacle, lower microphone, vibration motor contacts, and primary antenna feeds. Power and data travel between the charging sub-board and the main motherboard through an elongated Flexible Printed Circuit (FPC) interconnect ribbon cable running beneath or beside the battery pack.
While this modular layout simplifies targeted repairs, it introduces physical points of structural vulnerability. When a smartphone is dropped onto hard pavement or subjected to twisting forces inside a back pocket, severe shock waves propagate through the aluminum frame. These mechanical shocks can dislodge the micro-coaxial press-fit FPC connectors, partially decoupling the sub-board from the main logic board. In other instances, repeated flexing causes hairline micro-cracks across the paper-thin copper traces running inside the interconnect ribbon cable.
When the interconnect flex cable is cracked or partially disconnected, electrical symptoms can be puzzling. The phone may charge intermittently only when pressure is applied to a specific spot on the lower back glass, or it may recognize the charger but report an extremely slow charging rate due to severed data negotiation lines. Furthermore, because the sub-board also manages cellular antenna grounding and the primary voice microphone, sub-board or flex cable failures are frequently accompanied by secondary symptoms such as sudden cellular signal drops or callers reporting that they cannot hear your voice during phone calls.
Diagnosing sub-board and interconnect cable failures requires professional disassembly using precision heating plates to soften the rear glass adhesive without scorching internal optics. Once opened, technicians inspect the FPC connectors under high-magnification stereomicroscopes, re-seat loose connections with calibrated pressure, and replace cracked ribbon assemblies or damaged daughterboards with certified replacement parts.
10. Motherboard Power Management IC (PMIC) and Charging Controller Failure
At the apex of charging hardware complexity sits the motherboard-level power delivery circuitry. On the main logic board, specialized silicon chips—most notably the primary Power Management Integrated Circuit (PMIC), secondary sub-PMICs, and dedicated USB Type-C Charging Controllers (such as chips manufactured by Qualcomm, Samsung Shannon, Maxim Integrated, or Texas Instruments)—orchestrate all power distribution across the handset.
These sophisticated microchips contain thousands of microscopic transistors designed to step down incoming high-voltage current, regulate precise voltage rails for individual processing cores, monitor charge curves, and control fast-charging switching buck-boost converters. Despite robust internal circuit protection, these sensitive semiconductors remain vulnerable to severe electrical trauma. The most prevalent cause of PMIC failure is high-voltage electrical surges introduced by cheap, uncertified automotive 12V cigarette lighter adapters, lightning strikes on municipal power grids, or low-quality portable power banks lacking surge suppression capacitors.
When an electrical surge pierces the front-end overvoltage protection (OVP) diodes, it travels straight into the charging IC, welding internal semiconductor junctions together or vaporizing microscopic bonding wires. A blown charging IC will cause dramatic symptoms: the handset will draw exactly 0.00 amps on a diagnostic digital USB ammeter, the device may refuse to power on entirely, or the upper half of the motherboard will become scalding hot to the touch within seconds of inserting a charging cable as short-circuited silicon dissipates pure heat.
Repairing a damaged PMIC or charging controller is a highly specialized discipline known as component-level micro-soldering. Technicians must secure the logic board into precision magnetic PCB fixtures beneath high-end stereomicroscopes. Using precision hot-air rework stations calibrated to exact thermal profiles, the technician carefully desolders the damaged Ball Grid Array (BGA) chip—a silicon die measuring only a few millimeters square with hundreds of microscopic solder spheres beneath it—without disturbing adjacent micro-components. The technician cleans the motherboard pads, re-balls a brand-new replacement IC with leaded solder spheres, and fluxes and reflows the chip onto the board with surgical precision. This advanced repair capability saves clients hundreds of dollars compared to replacing the entire logic board.
Comprehensive Comparison Tables: Symptoms, Fixes, and Electrical Profiles
To assist in diagnosing your charging issues systematically, our engineering team has compiled three detailed technical reference matrices comparing symptoms, troubleshooting tiers, and fast-charging electrical standards.
| Observed Symptom | Primary Probable Root Cause | Diagnostic Complexity | Recommended Action |
|---|---|---|---|
| Cable fits loosely, wiggles, or falls out easily | Compacted pocket lint or broken port retaining spring clips | Low / DIY | Perform gentle non-conductive toothpick cleaning or replace worn port |
| Charges only when cable is held at an upward angle | Frayed internal cable core or bent/worn USB-C pin contacts | Low to Moderate | Test with certified new cable; if issue persists, replace USB-C receptacle |
| Persistent "Moisture Detected" warning icon | Moisture in cavity or conductive mineral/corrosion residue on CC pins | Moderate | Passive air drying; ultrasonic 99% alcohol cleaning or port replacement |
| Slow charging notification with certified fast charger | Severed D+/D- or CC data lines; protocol negotiation failure | Moderate | Verify cable wattage rating; inspect sub-board interconnect ribbon cable |
| Device becomes extremely hot near camera when plugged in | Short-circuited power management IC (PMIC) or filtering capacitor | High / Advanced | Unplug immediately to prevent fire; component micro-soldering required |
| Charges via wireless Qi pad but completely dead via cable | Defective USB-C receptacle, blown sub-board fuse, or disconnected FPC | Moderate to High | Replace charging sub-board assembly and inspect interconnect flex |
Understanding which repair tasks are safe for everyday consumers versus those requiring professional workshop tooling ensures you do not inadvertently destroy your handset during troubleshooting.
| Maintenance & Repair Task | Safe For DIY At Home? | Required Tooling & Precautions | Associated Risk Profile |
|---|---|---|---|
| Clearing surface pocket lint from port | Yes (With Care) | Wooden toothpick, high-intensity light, canned air | Low if non-conductive; high if metal needles are used |
| Forced restart and safe mode software triage | Yes (100% Safe) | Standard physical button combinations | Zero risk of hardware or data compromise |
| Passive air drying after water exposure | Yes | Circulating room-temperature fan, silica packs | Zero risk; high risk if hair dryer heat is applied |
| Chassis opening and sub-board replacement | No (Professional) | Thermal separator plate, suction clamp, ESD mat | High: glass back cracking, punctured battery, severed flexes |
| USB-C port desoldering & micro-soldering | No (Professional) | Microscope, hot-air rework station, flux, leaded solder | Extreme: burned circuit traces, lifted pads, total board death |
Modern fast-charging protocols negotiate varying electrical profiles. The table below details the technical specifications across prevalent Android charging ecosystems.
| Charging Standard | Peak Wattage Range | Voltage & Current Profiles | Primary Supported Devices |
|---|---|---|---|
| USB Power Delivery 3.0 (PPS) | 25W – 45W+ | 3.3V–21V dynamic in 20mV steps up to 5A | Samsung Galaxy S24/S23 Ultra, Google Pixel 8/7 Pro |
| Qualcomm Quick Charge 4+ / 5 | 27W – 100W+ | 5V–20V stepped with intelligent negotiation | Snapdragon-powered Xiaomi, Motorola, Sony Xperia |
| SuperVOOC / Warp Charge | 65W – 100W | 10V at 6.5A – 11V at 9.1A (Dual-cell battery) | OnePlus 12/11, Oppo Find Series, Realme handsets |
| Standard USB-C Legacy Profile | 10W – 15W | 5V at 2A or 5V at 3A fixed direct current | Entry-level Android handsets, basic wireless earbuds |
Professional Hardware Diagnostic Workflow at Phone Repair Place
Resolving a stubborn phone not charging problem requires dedicated laboratory equipment when software adjustments and port cleaning fail to restore electrical functionality. Bringing your device to a certified repair facility ensures accurate diagnostics without the risk of costly misdiagnosis. At Phone Repair Place in Hyattsville, MD, our technical specialists follow a rigorous, laboratory-grade diagnostic sequence engineered to isolate power faults quickly and cost-effectively.
Our evaluation begins with non-invasive digital power analysis using precision inline USB-C diagnostic power meters. These specialized meters measure real-time electrical metrics down to the single milliamp (mA) and millivolt (mV). By observing how the device responds during the initial five seconds of connection, our technicians can instantly distinguish between a broken CC communication pin (which draws a constant 5V at 0.00A), a dead lithium cell in deep sleep (which draws a slow 5V at 0.10A to 0.40A), and a short-circuited logic board (which draws an immediate high-amperage surge that trips the bench supply's overcurrent protection).
Next, the handset undergoes high-magnification optical inspection under a continuous-zoom stereo microscope equipped with ring LED illumination. Technicians inspect the internal port cavity for hair-thin pin fractures, microscopic copper burn pits caused by electrical arcing, and concealed liquid corrosion hidden behind the plastic tongue. We also perform a mechanical retention test to ensure the internal ground retention spring clips have not lost their structural tension.
If internal hardware failure is indicated, our technicians carefully dismount the rear glass or display assembly using temperature-controlled vacuum heating plates that soften factory adhesives without compromising organic light-emitting diode (OLED) layers. Once inside, we utilize thermal imaging cameras to inspect the circuit boards under live power. Short-circuited surface mount capacitors and damaged power management ICs generate intense infrared thermal signatures, glowing brightly on the thermal camera screen and allowing our technicians to locate the defective semiconductor component within seconds. Whether your device requires a simple sub-board replacement, a genuine battery refresh, or advanced micro-soldering, our workshop stocks premium OEM-specification components to complete repairs swiftly.
Preventive Best Practices to Protect Your Android Charging Subsystem
Proactive care and mindful handling habits significantly reduce the likelihood of experiencing unexpected charging failures, extending the operational longevity of both your physical USB-C receptacle and internal battery chemistry:
- Adopt Gentle Straight-Line Cable Insertion: Always align the charging plug squarely with the receptacle before applying gentle pressure. Never insert cables at an angle, force upside-down cables into worn ports, or violently yank cords out from across the room. Remove cables by grasping the rigid plastic connector collar rather than pulling on the flexible wire.
- Invest in Protective Silicone Port Plugs: If you work in construction, landscaping, woodworking, or manufacturing environments with high airborne dust and metal shavings, insert a low-profile silicone anti-dust plug into your phone's USB-C port during work hours to block debris accumulation.
- Avoid Charging Under Heavy Thermal Stress: Do not leave your phone charging on automobile dashboards exposed to blistering summer sun, under soft pillows, or inside heavy insulated protective cases during rapid 45W fast charging. Excess ambient heat degrades battery health and forces thermal throttling.
- Practice Healthy Battery Cycle Habits: Modern lithium-ion chemistry experiences the least electrochemical degradation when maintained between 20% and 80% state of charge. Enable the built-in "Protect Battery" or "Adaptive Charging" toggles in Android settings, which automatically cap overnight charging at 80% to 85% to prevent prolonged high-voltage saturation stress.
- Use Certified Surge-Protected Charging Equipment: Avoid cheap, unbranded multi-port wall adapters and roadside convenience store car chargers that lack filtering capacitors and overvoltage protection diodes. A single electrical spike from a vehicle alternator can permanently destroy your phone's motherboard charging circuitry.
Visit Phone Repair Place for Fast, Certified Android Charging Port Repair
Do not let a frustrating charging port malfunction, loose cable connection, or dead battery leave you disconnected from family, work, and essential digital tools. Whether you need a precision USB-C port cleaning, a modular daughterboard swap, or advanced motherboard micro-soldering, the experienced technical team at Phone Repair Place is ready to assist you today. We service all major smartphone brands, offering dedicated Samsung phone repair specialists, complete professional Android phone repair services, certified iPhone repair services, as well as comprehensive iPad and tablet repair services, computer and laptop repair solutions, and gaming console HDMI and hardware fixes across our comprehensive electronic repair catalog.
Our workshop maintains an extensive inventory of OEM-grade charging ports, high-capacity replacement batteries, and precision hardware components right here in Hyattsville, MD. Most smartphone charging port and battery repairs are completed within 20 to 45 minutes while you relax or shop inside The Mall at Prince Georges. Every repair is backed by our comprehensive parts and labor warranty, giving you total peace of mind. Walk-ins are warmly welcomed every day of the week, or you can call our technicians directly for an immediate free diagnostic quote.
Phone Repair Place
3500 East-West Hwy STE 1417,
Hyattsville, MD 20782, United States
(202) 870-4914
https://phonerepairpgmall.com/
Frequently Asked Questions
How much does it typically cost to repair an Android phone charging port?
The cost to fix an Android charging port depends primarily on whether the issue requires professional ultrasonic cleaning, a modular sub-board replacement, or component-level micro-soldering on the main logic board. Basic lint extraction and contact cleaning are very economical, while standard sub-board and port replacements typically range from $45 to $89 depending on your specific phone model. Motherboard-level power IC soldering repairs for flagship devices represent a higher investment but remain far more cost-effective than purchasing a new smartphone.
Can I safely charge my Android phone wirelessly if the USB-C port is broken?
Yes, if your Android smartphone supports Qi wireless charging—such as Samsung Galaxy S series, Google Pixel flagship models, and select OnePlus devices—you can safely continue recharging your device on an inductive wireless charging pad while your physical USB-C port is damaged. However, wireless charging generates more ambient heat, charges at a slower rate than wired fast charging, and will not allow you to transfer data, connect wired Android Auto in your car, or recover files to a computer until the physical port is repaired.
Is it safe to clean my Android charging port with alcohol at home?
You should never pour or spray liquid alcohol directly into your smartphone charging port. If you need to dissolve sticky residue or light oxidation, lightly dampen the very tip of a wooden toothpick with 99% anhydrous isopropyl alcohol—ensuring it is not dripping wet—and gently wipe the interior surfaces with the device completely powered off. Allow the alcohol to evaporate completely for at least 15 minutes before attempting to connect a charging cable.
Why does my Android phone say "Fast Charging" for a second and then change to slow charging?
This symptom typically occurs when your phone successfully initiates the initial fast-charging handshake but cannot sustain the requested high-amperage current due to high electrical resistance along the circuit. Common culprits include a slightly degraded charging cable with broken internal copper strands, dirty or oxidized pin contacts inside the USB-C port, or an overheating battery cell that forces the operating system to throttle charging speeds to prevent thermal damage.
How long does an in-store charging port replacement take at Phone Repair Place?
At Phone Repair Place in Hyattsville, MD, most Android charging port cleanings and modular sub-board replacements are completed in just 20 to 35 minutes. Our certified technicians maintain a comprehensive inventory of genuine-quality parts on site, allowing you to have your device diagnosed, repaired, and thoroughly bench-tested during a single convenient walk-in visit to our Prince George's Mall location.
Need This Problem Fixed Fast?
Bring your broken smartphone, tablet, or console to Phone Repair Place in Hyattsville, MD for quick diagnosis and same-day turnaround.